n8n
xmemory integration with n8n
Section titled “xmemory integration with n8n”Visit https://xmemory.ai/integration-overview/ for comprehensive guides, API references, and integration examples.
API key: To use xmemory APIs or integrations (including n8n), you need an API key. Please register your interest at https://xmemory.ai and we will reach out to give access. Copy and securely store the key. Never share your API key publicly.
Integration with n8n-nodes-xmemory custom node
Section titled “Integration with n8n-nodes-xmemory custom node”This chapter walks through the full integration flow using the n8n-nodes-xmemory custom node:
- Add xmemory node
- Create instance from YAML
- Authorize using token
- Write memory
- Read memory
- Run full execution
Source code of the node could be found in the n8n-nodes-xmemory repository.
0) Install xmemory node
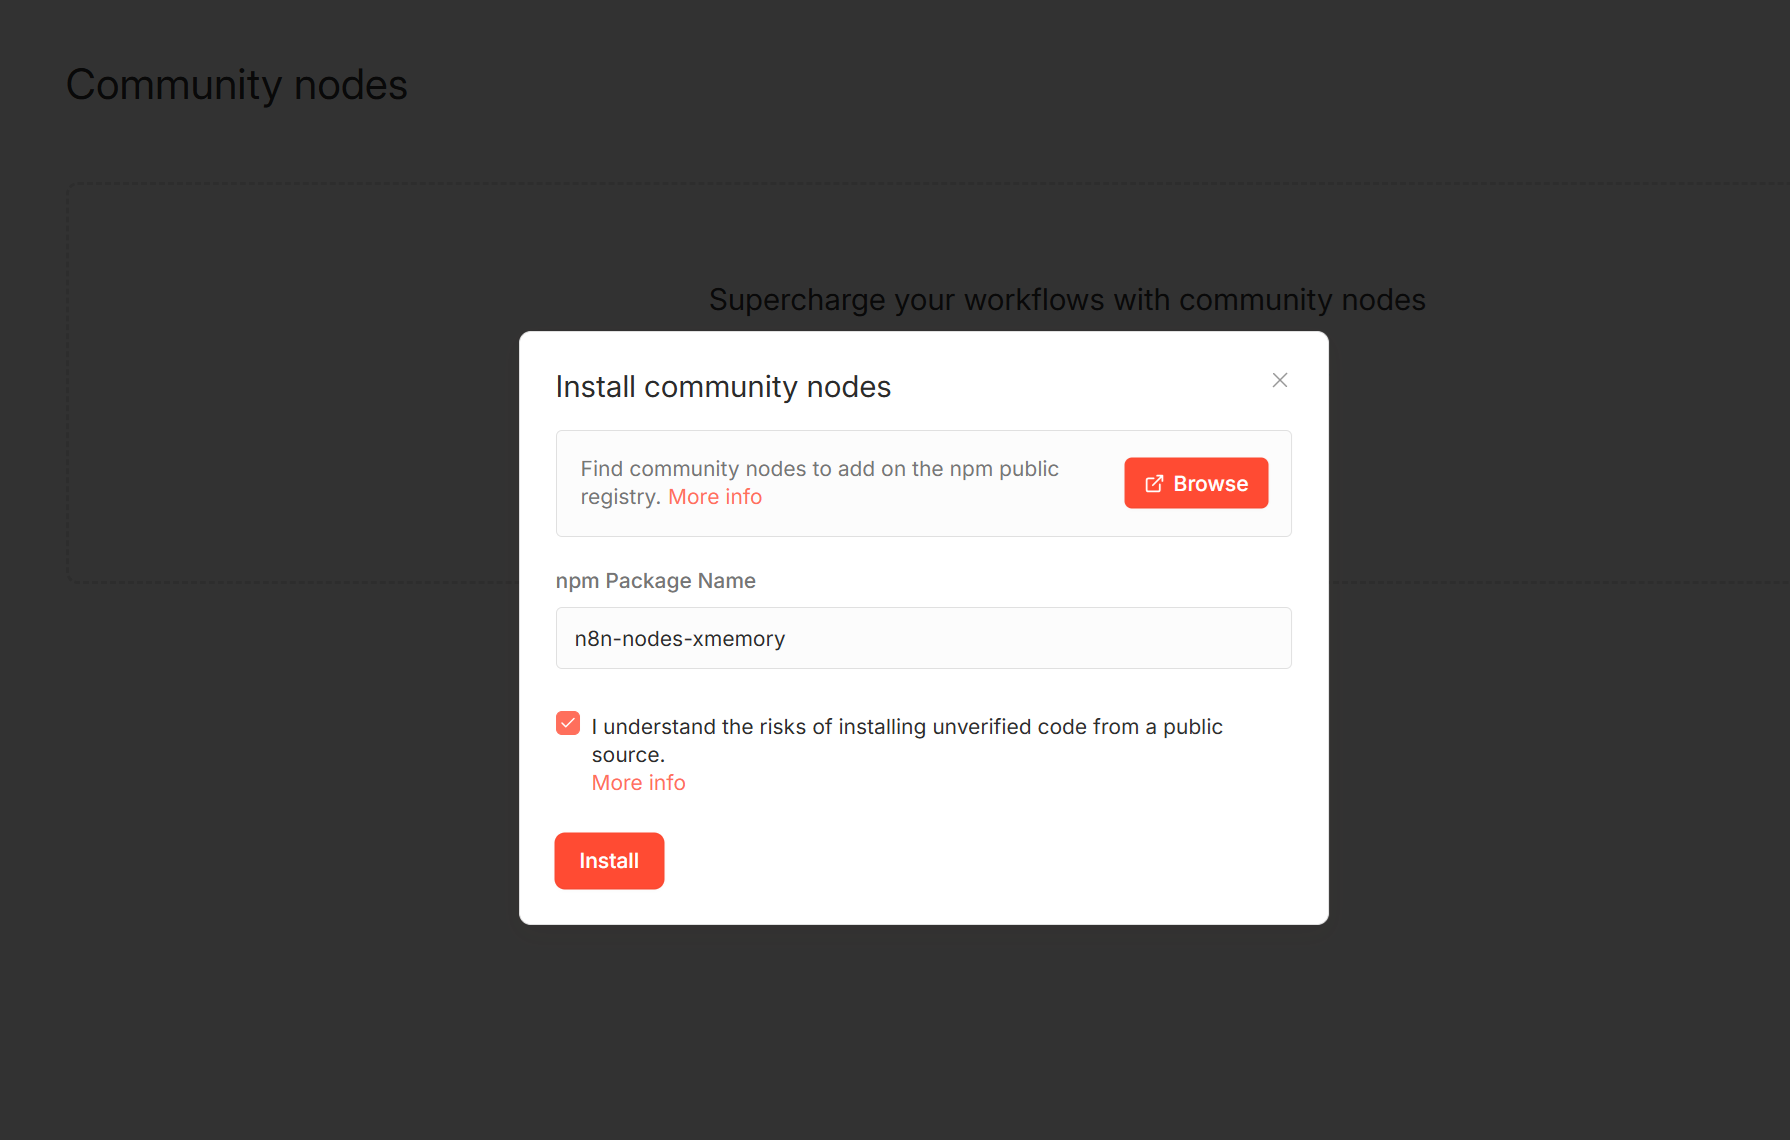
Section titled “0) Install xmemory node”- Go to Settings -> Community Nodes in n8n.
- Click “Install a community node”.
- Enter
n8n-nodes-xmemoryand install the package.
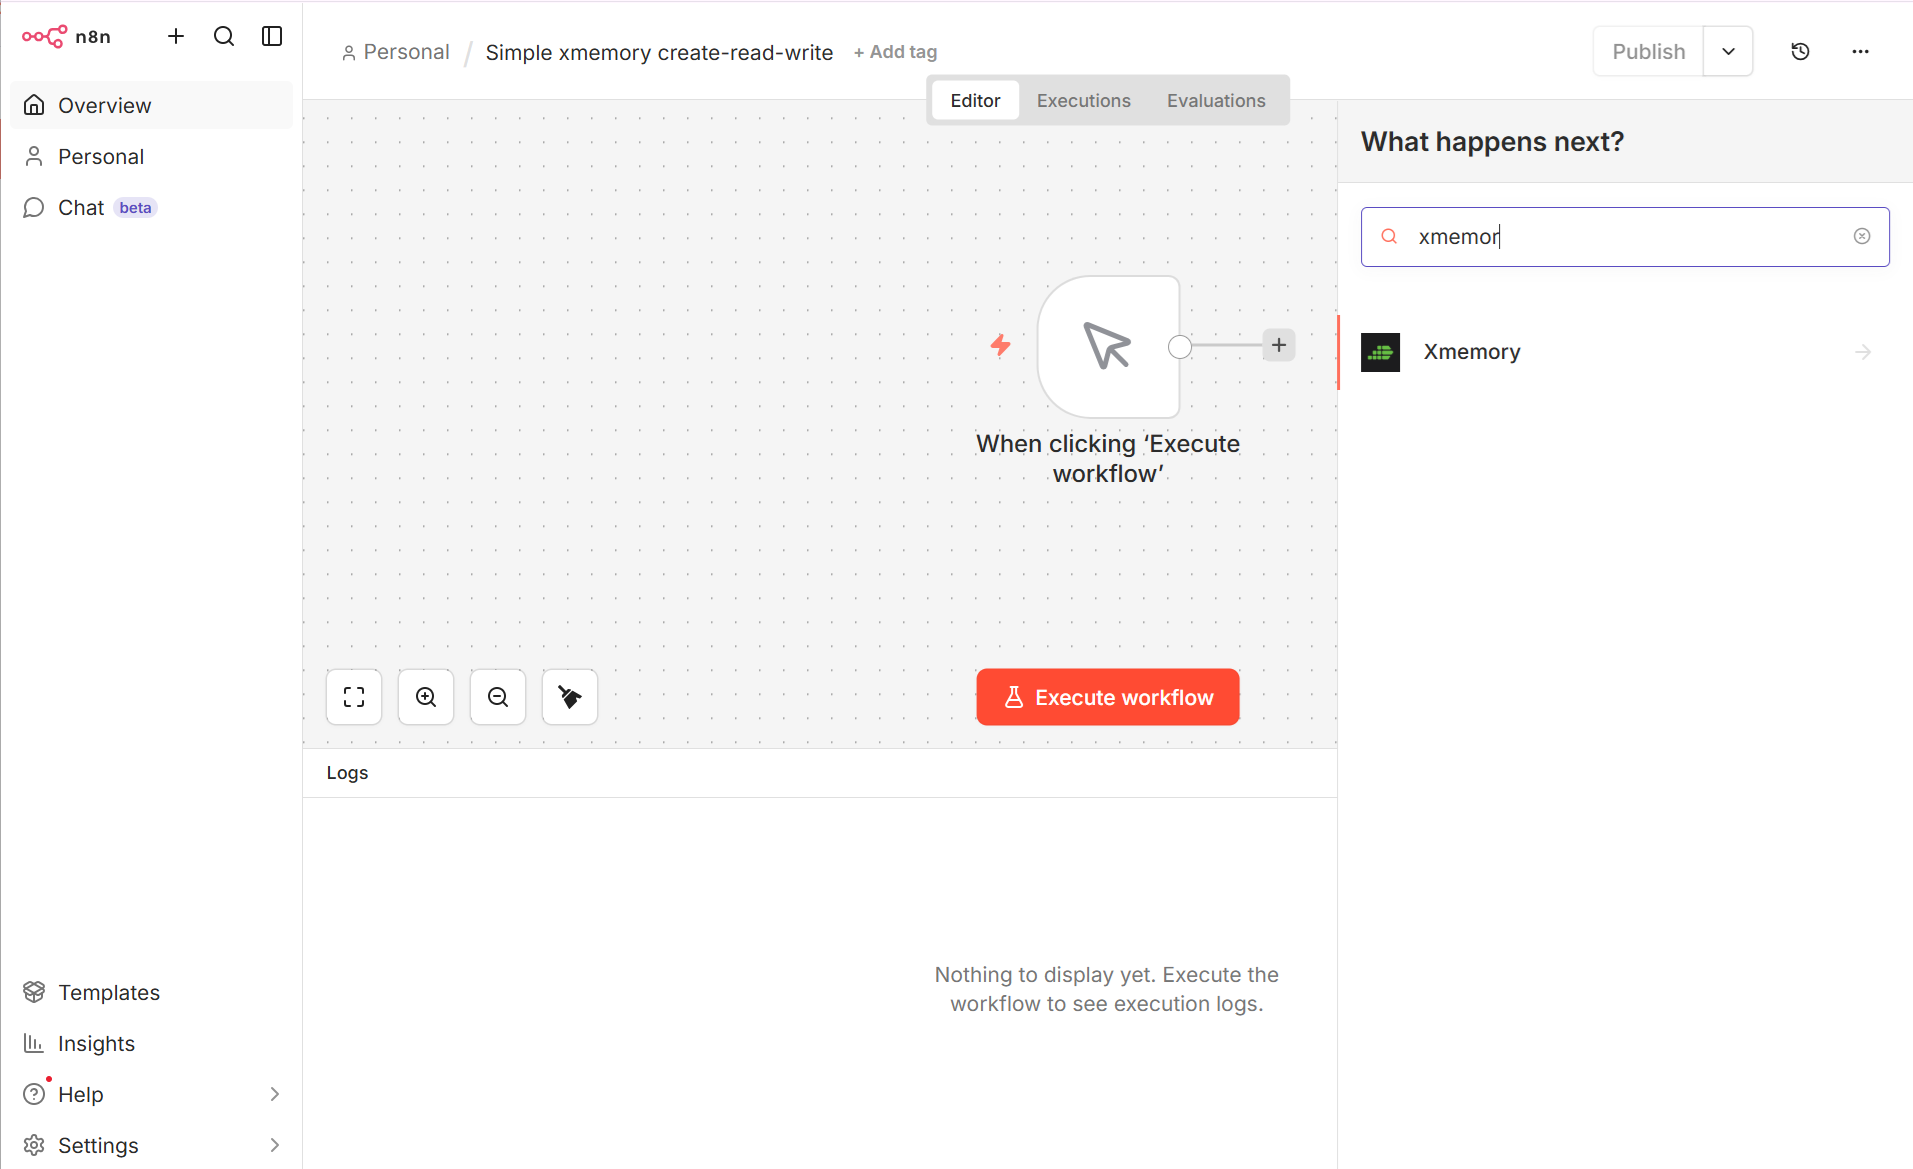
1) xmemory node
Section titled “1) xmemory node”Add the xmemory custom node in your workflow.
2) Create instance from yml
Section titled “2) Create instance from yml”Use the node operation that creates a new xmemory instance from a YAML schema.
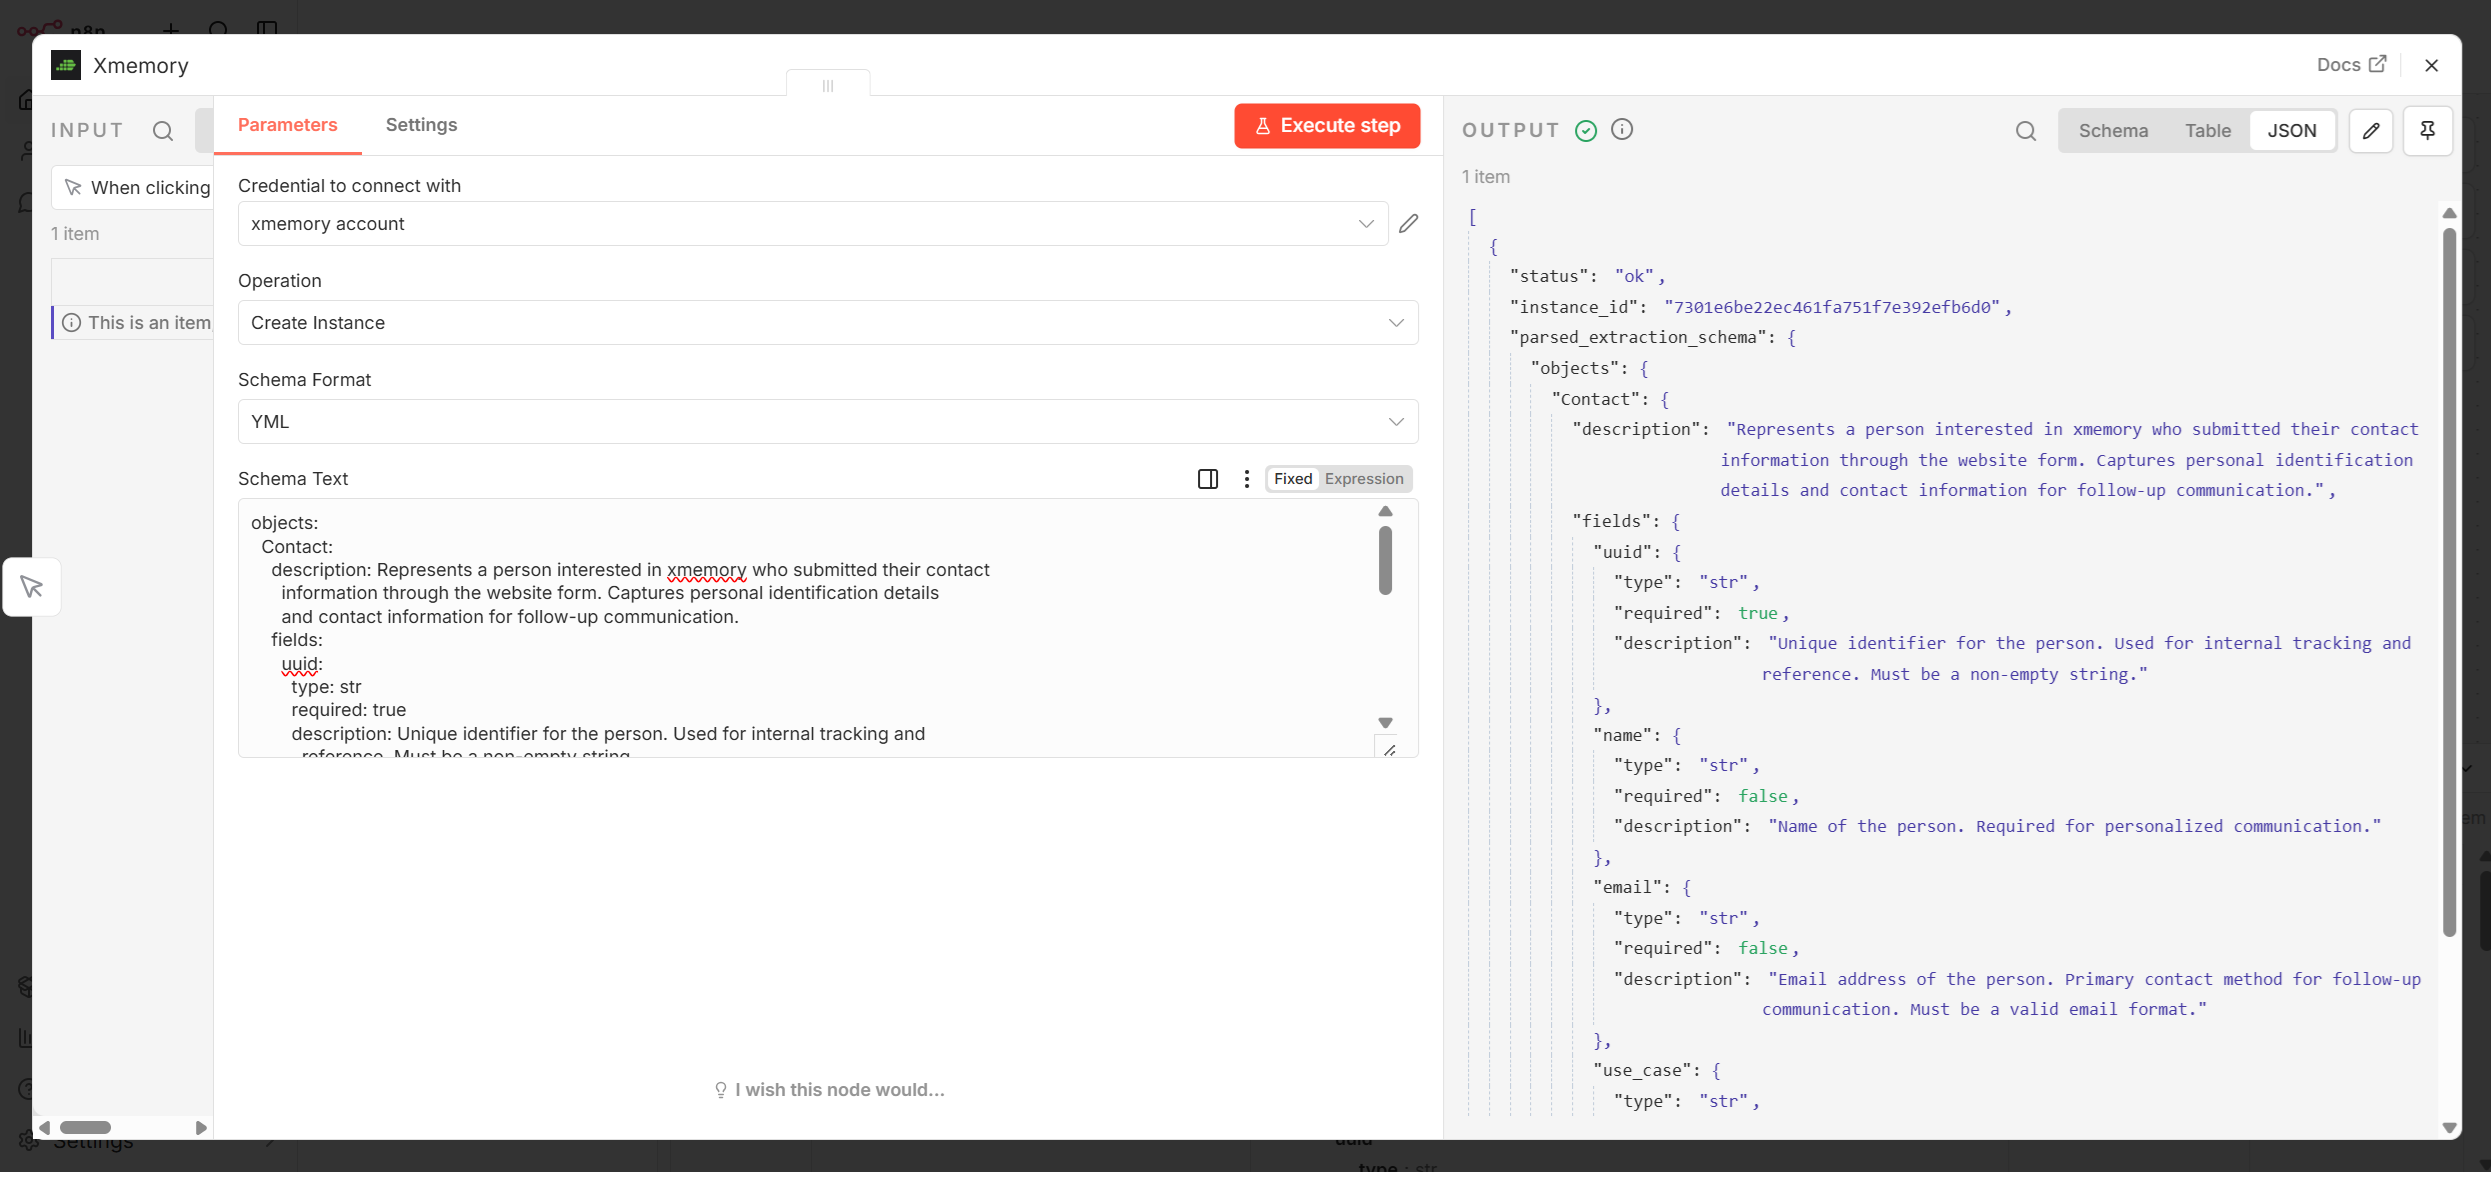
Here the following xmemory schema was used:
objects:  Contact:    description: Represents a person interested in xmemory who submitted their contact      information through the website form. Captures personal identification details      and contact information for follow-up communication.    fields:      uuid:        type: str        required: true        description: Unique identifier for the person. Used for internal tracking and          reference. Must be a non-empty string.      name:        type: str        required: false        description: Name of the person. Required for personalized communication.      email:        type: str        required: false        description: Email address of the person. Primary contact method for follow-up          communication. Must be a valid email format.      use_case:        type: str        required: false        description: Optional field to capture the specific use case or interest of the person regarding xmemory. This information can help tailor follow-up communication and provide relevant resources.
relations: {}
It represents a simple schema for a chatbot collecting contact information from website visitors interested in xmemory.
Normally, you don’t need to create instances on-the-fly. Create your instance once, store the instance_id, and reuse it in your workflow for all subsequent write and read operations.
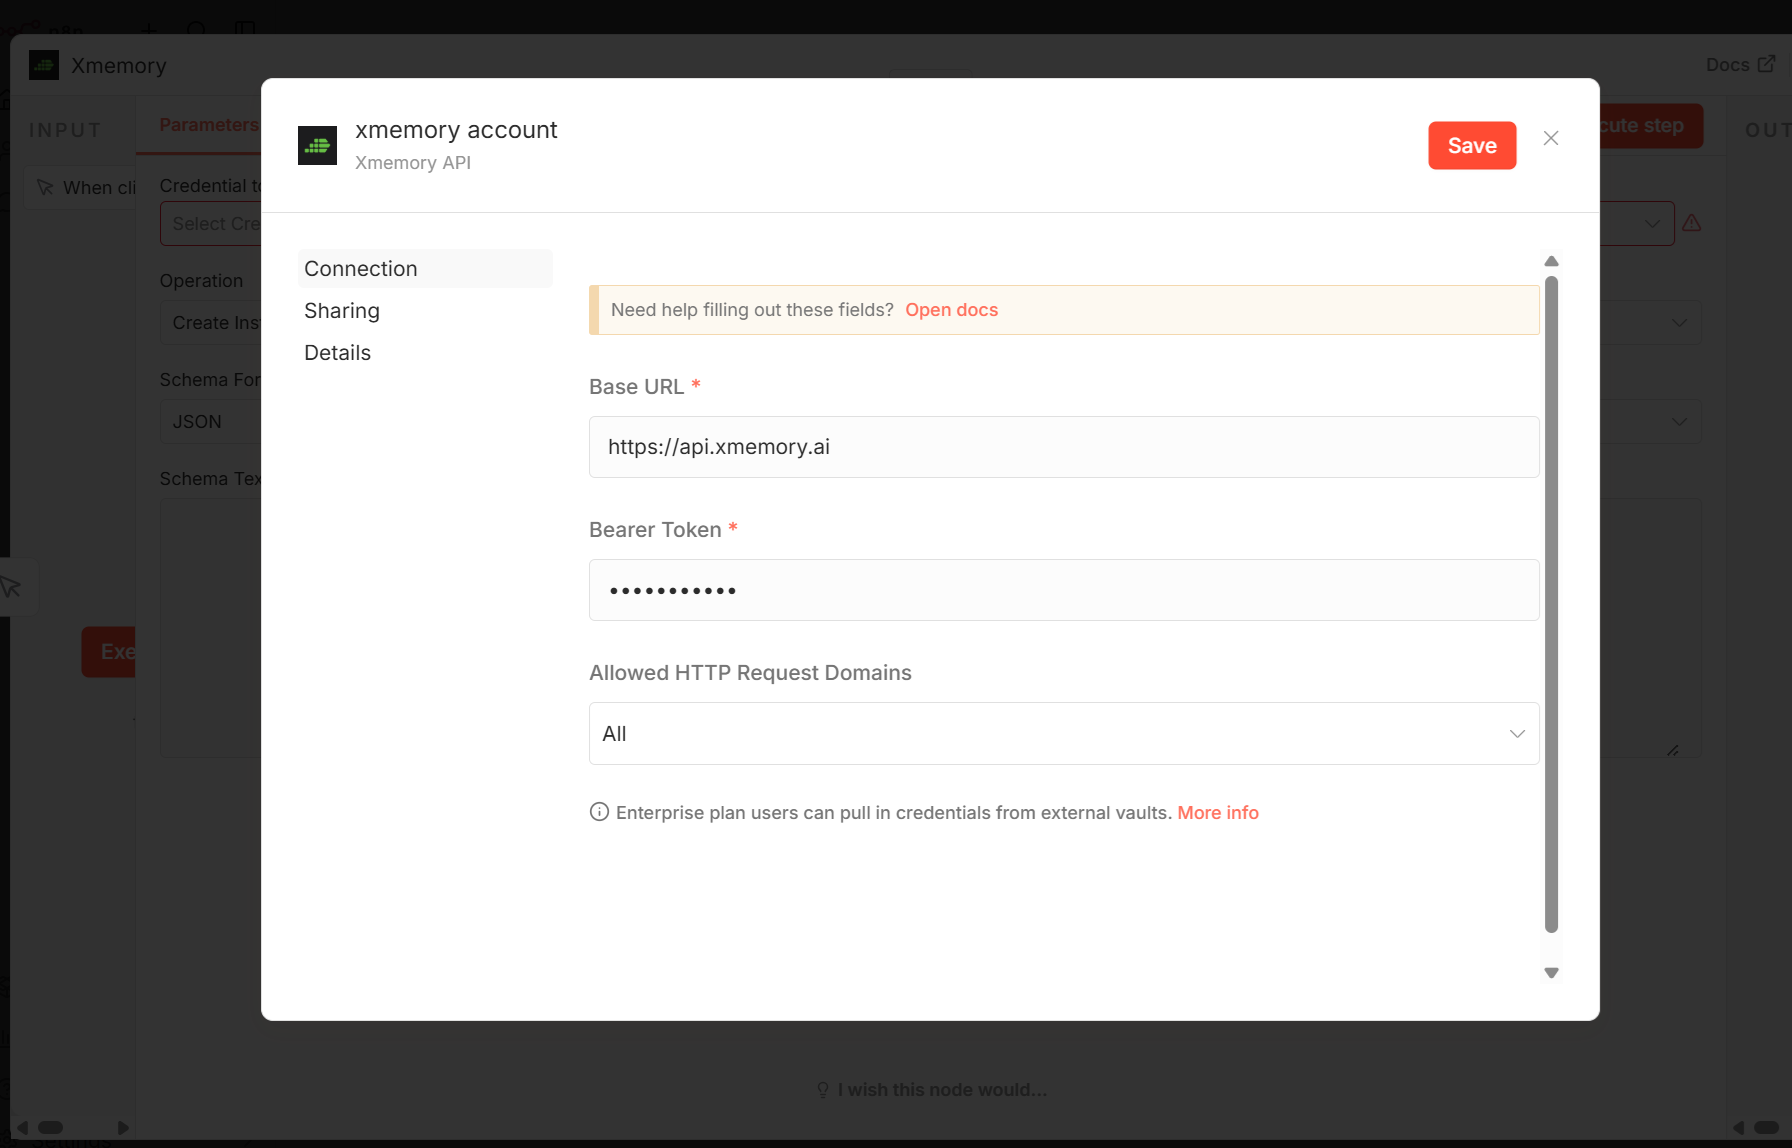
3) Authorize using token
Section titled “3) Authorize using token”Configure your xmemory API token in node credentials so the workflow can access your instance.
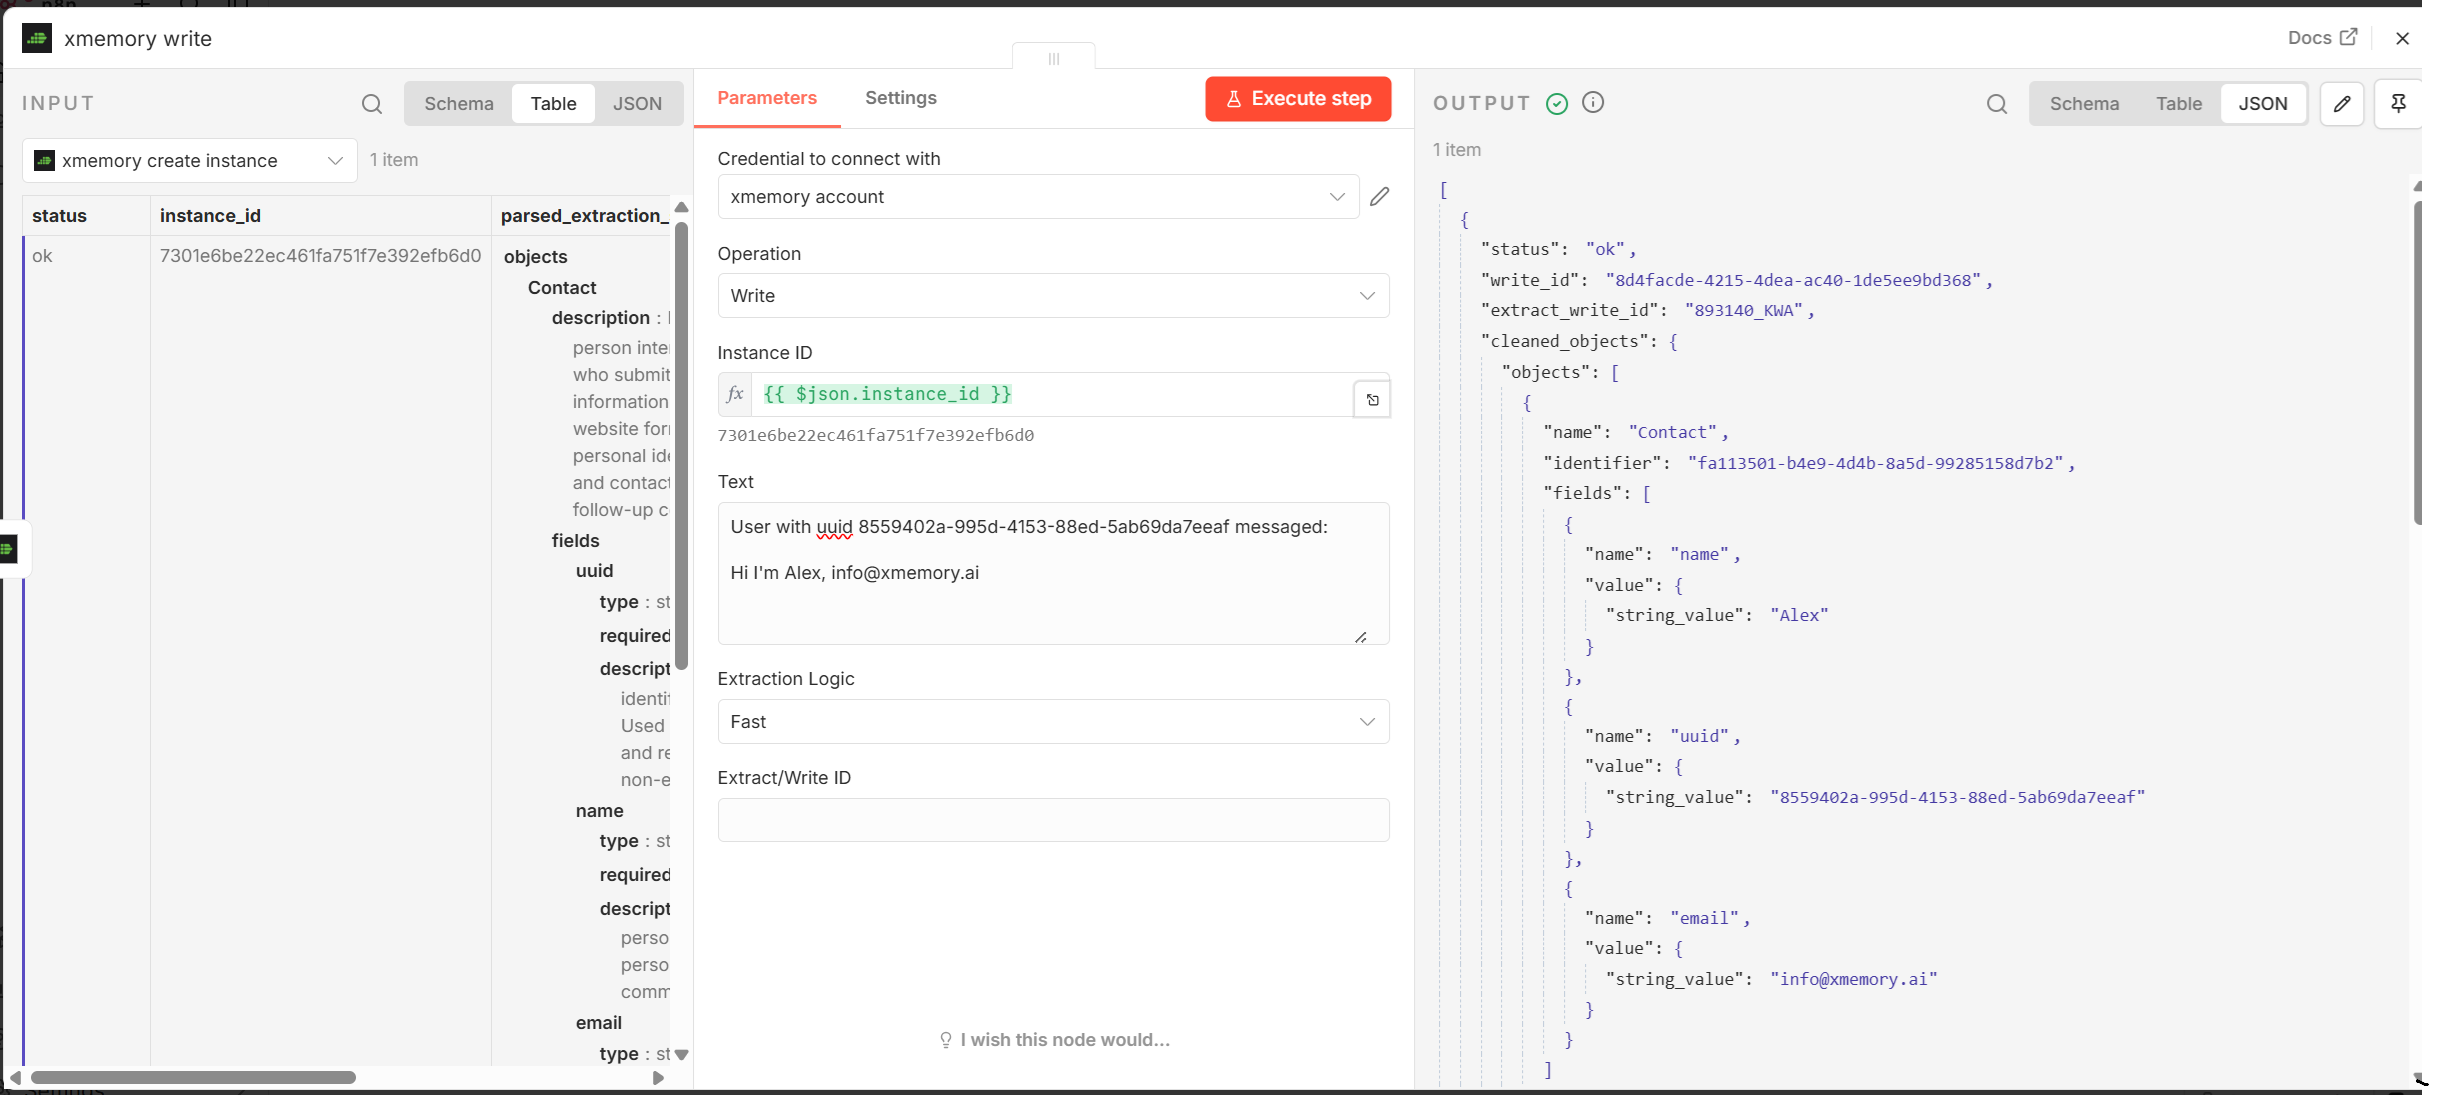
4) Write
Section titled “4) Write”Send content to xmemory with the write operation.
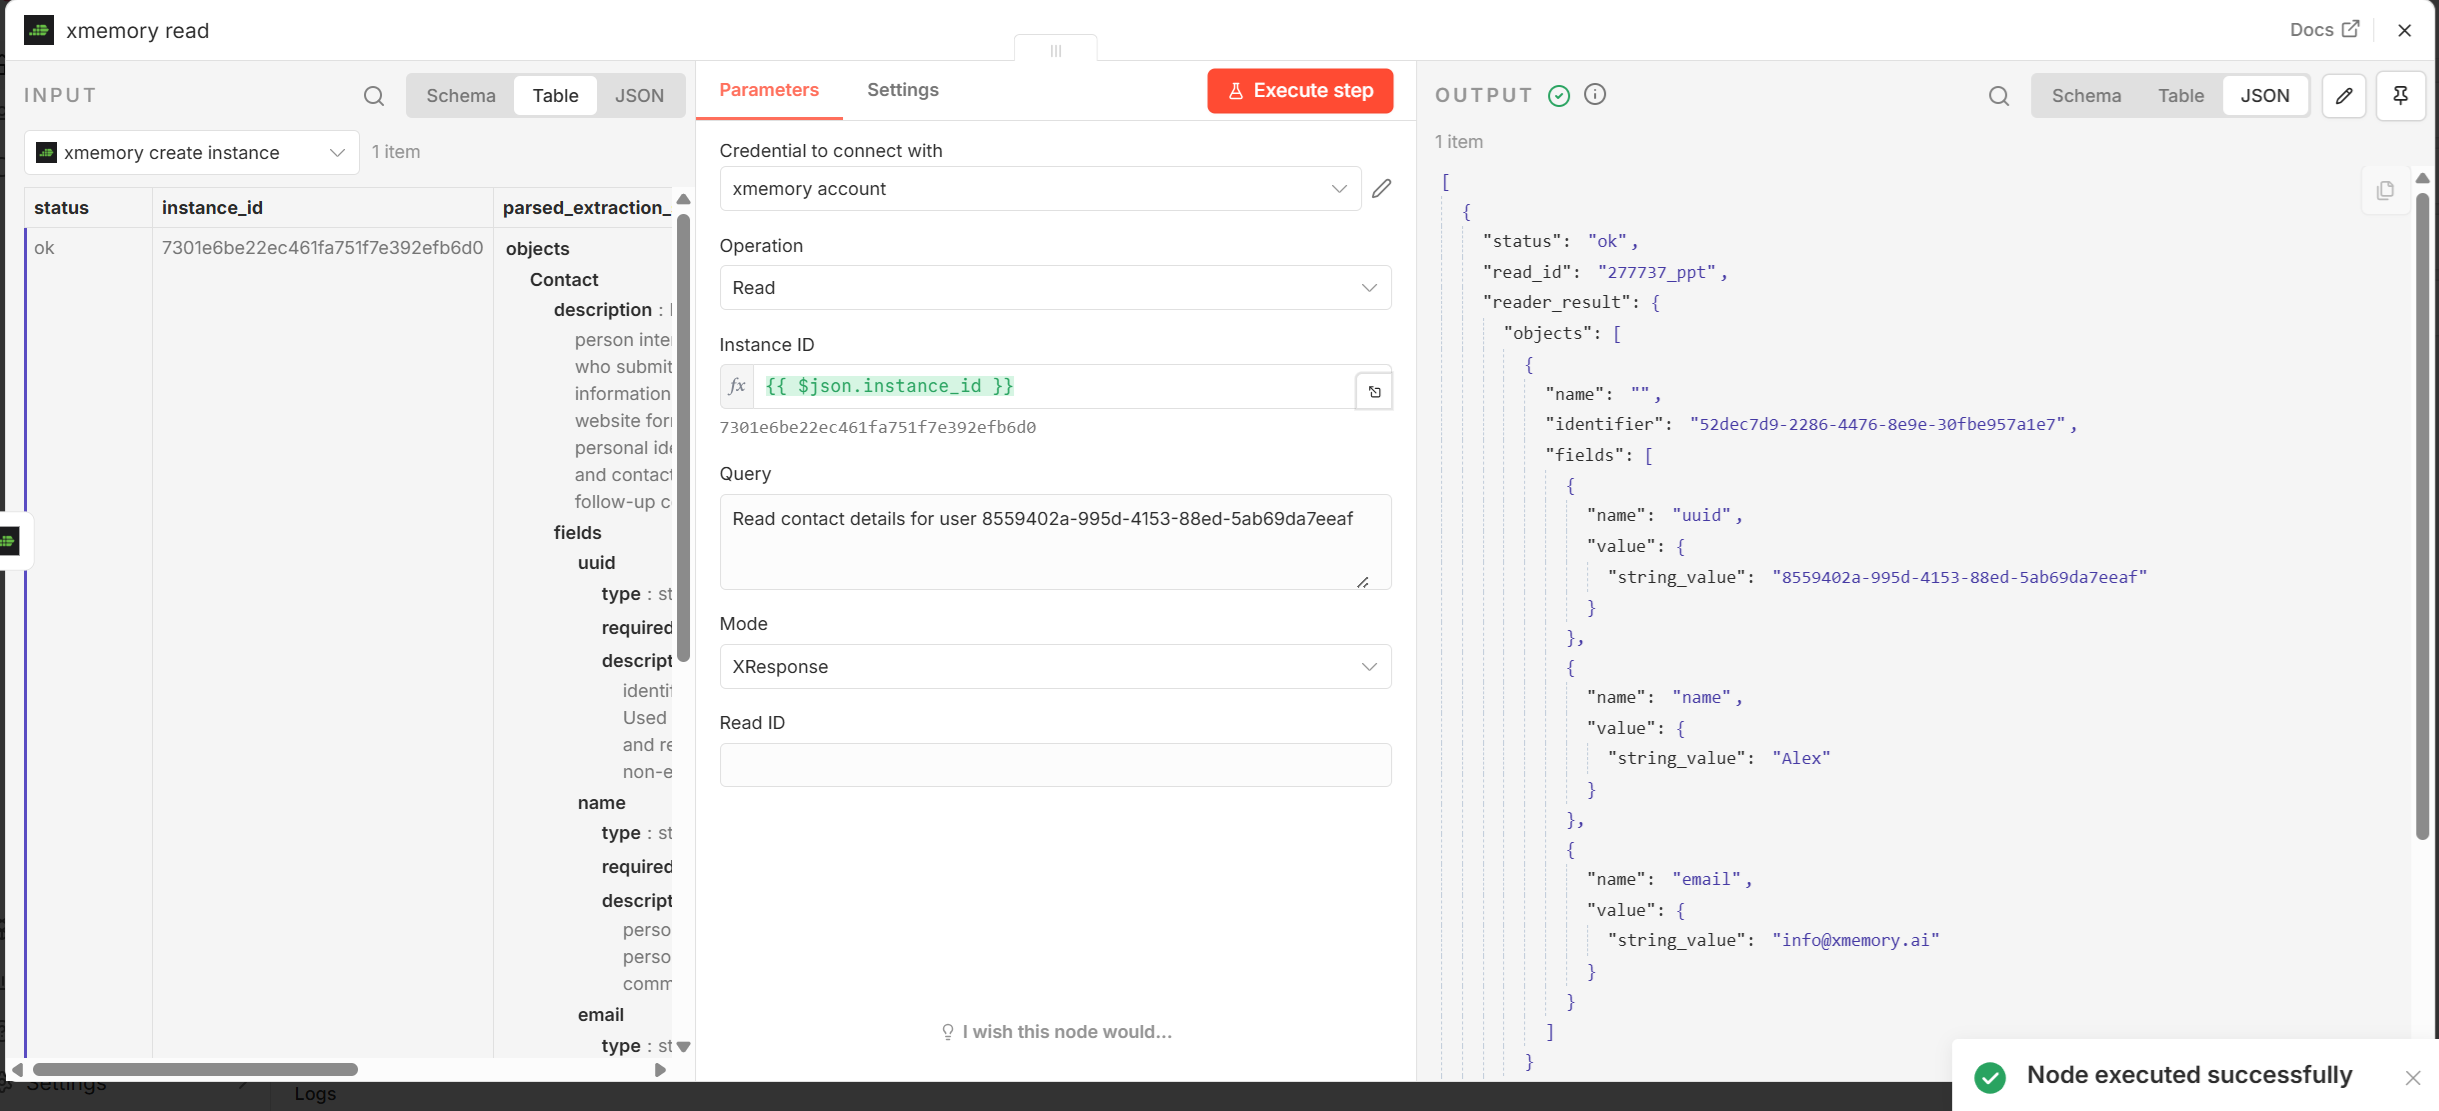
5) Read
Section titled “5) Read”Query stored memory with the read operation.
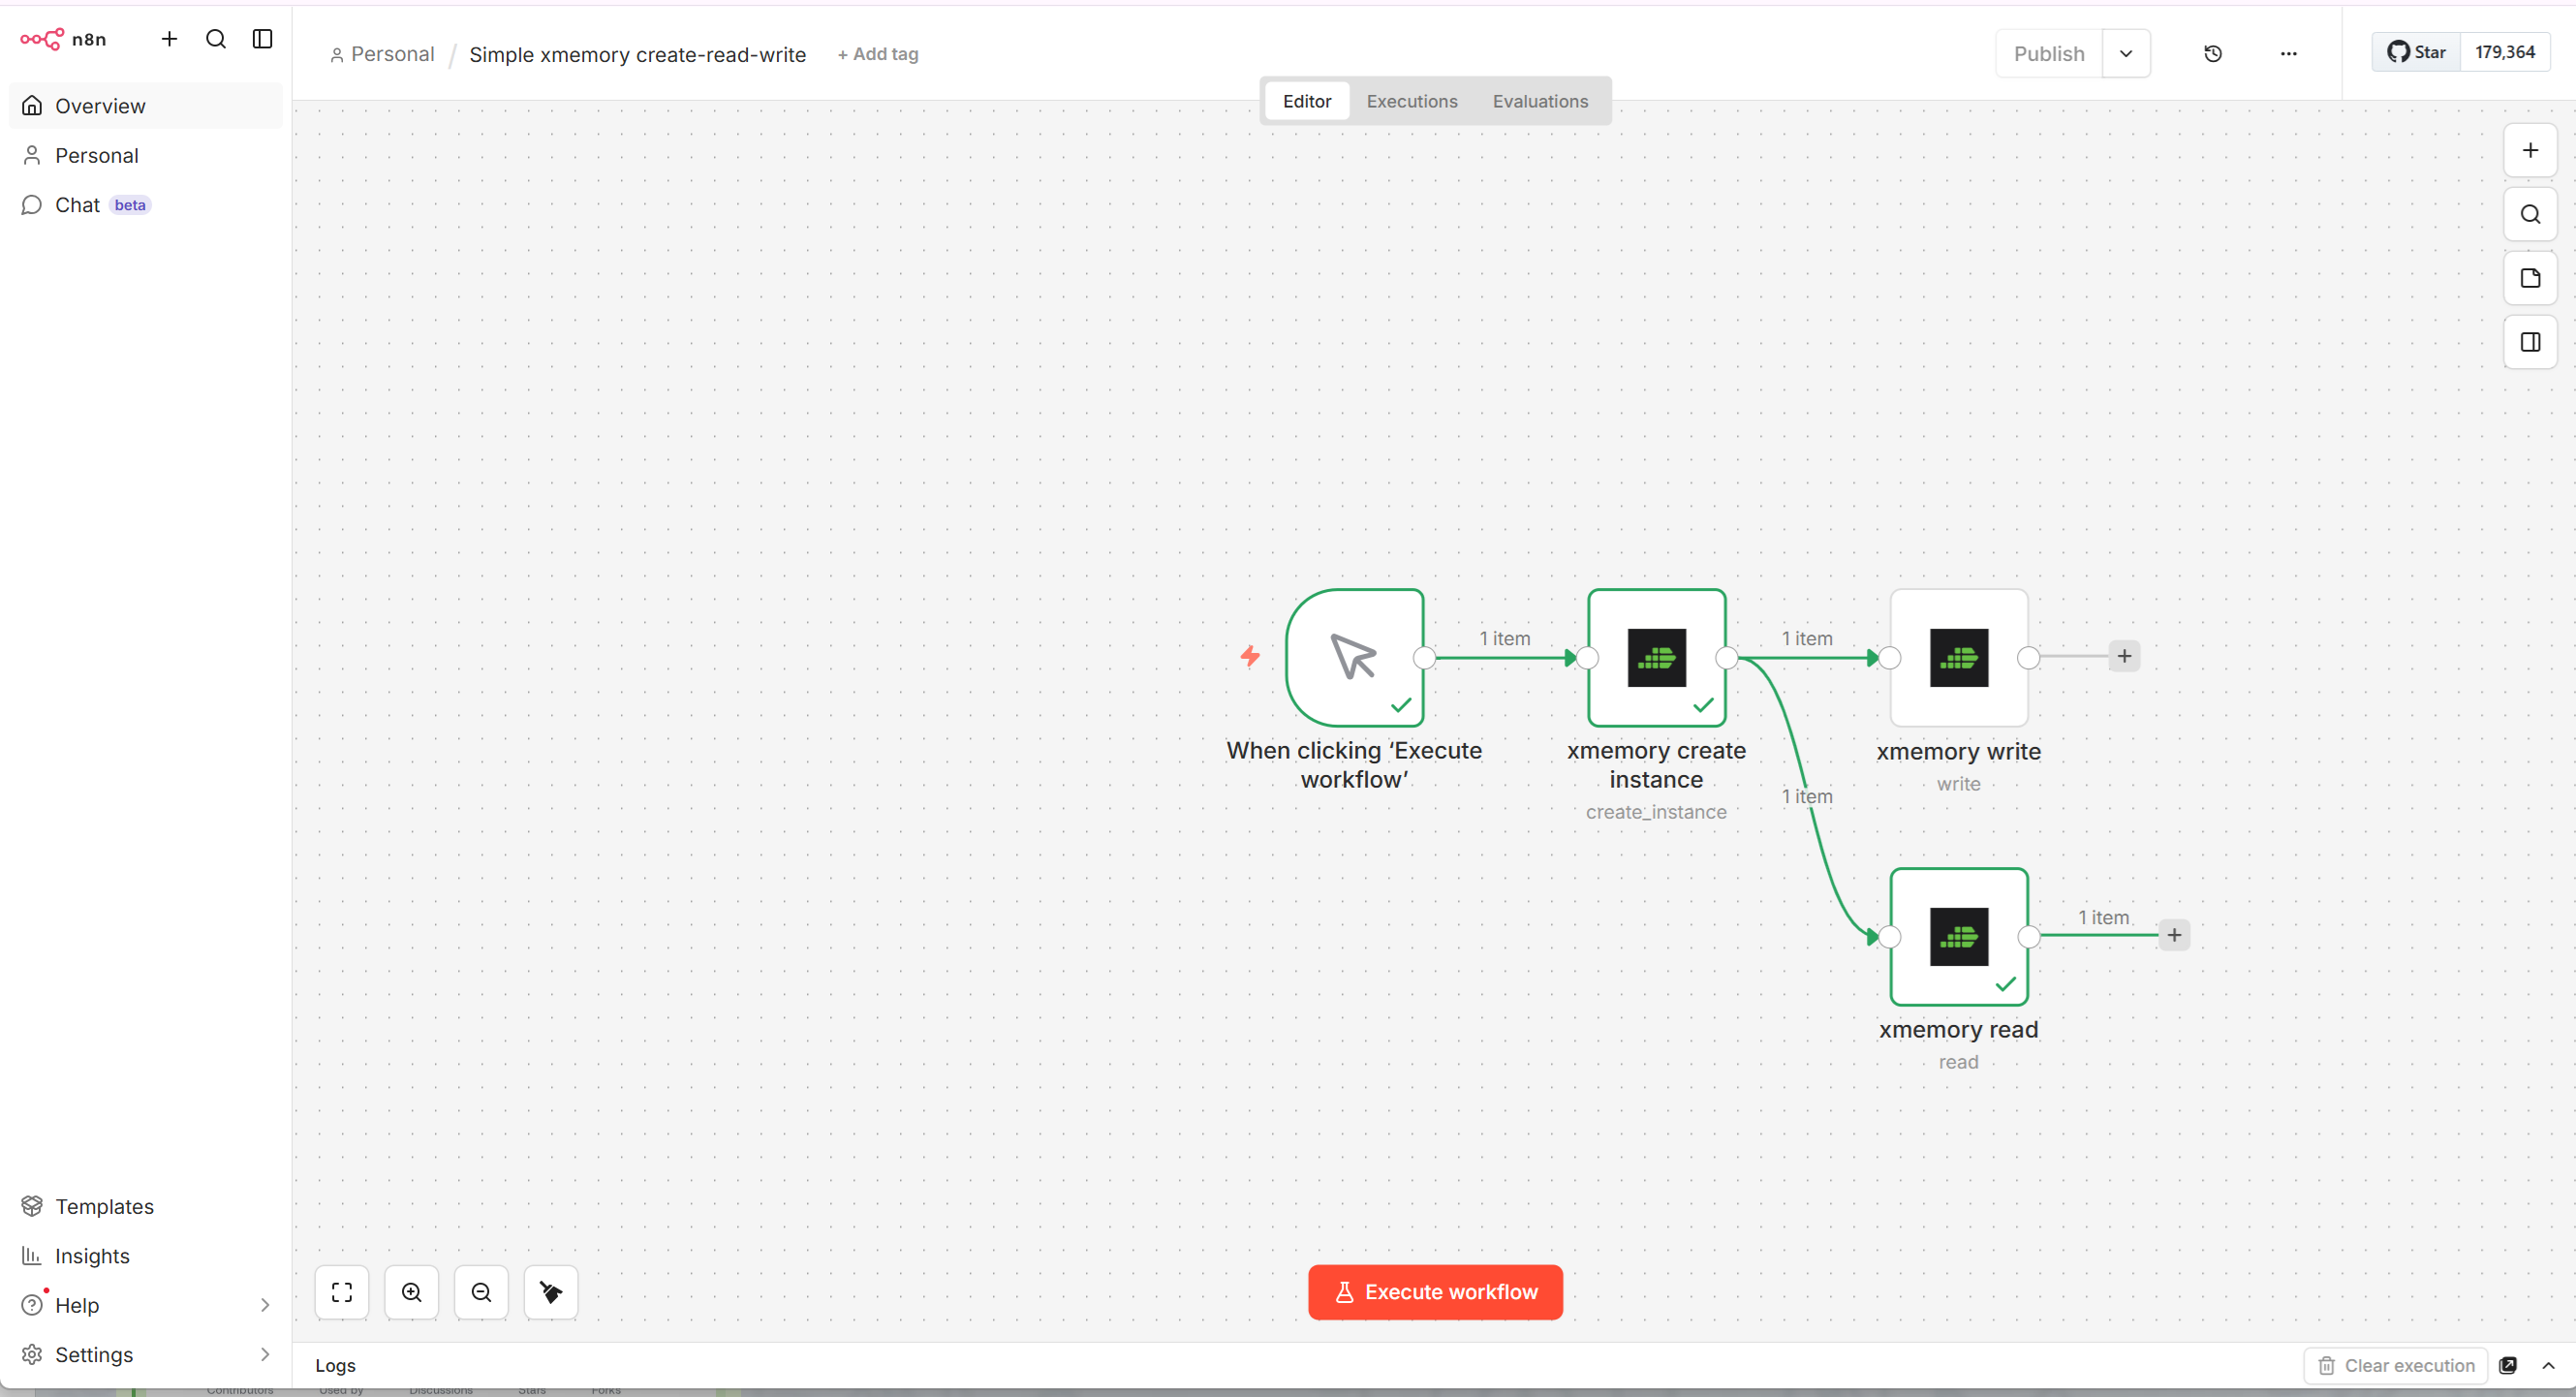
6) Full execution
Section titled “6) Full execution”Execute the workflow end-to-end to validate create, write, and read in one run.
Integration with xmemory MCP
Section titled “Integration with xmemory MCP”You can also connect n8n to xmemory via MCP. For full MCP documentation, see https://xmemory.ai/mcp.
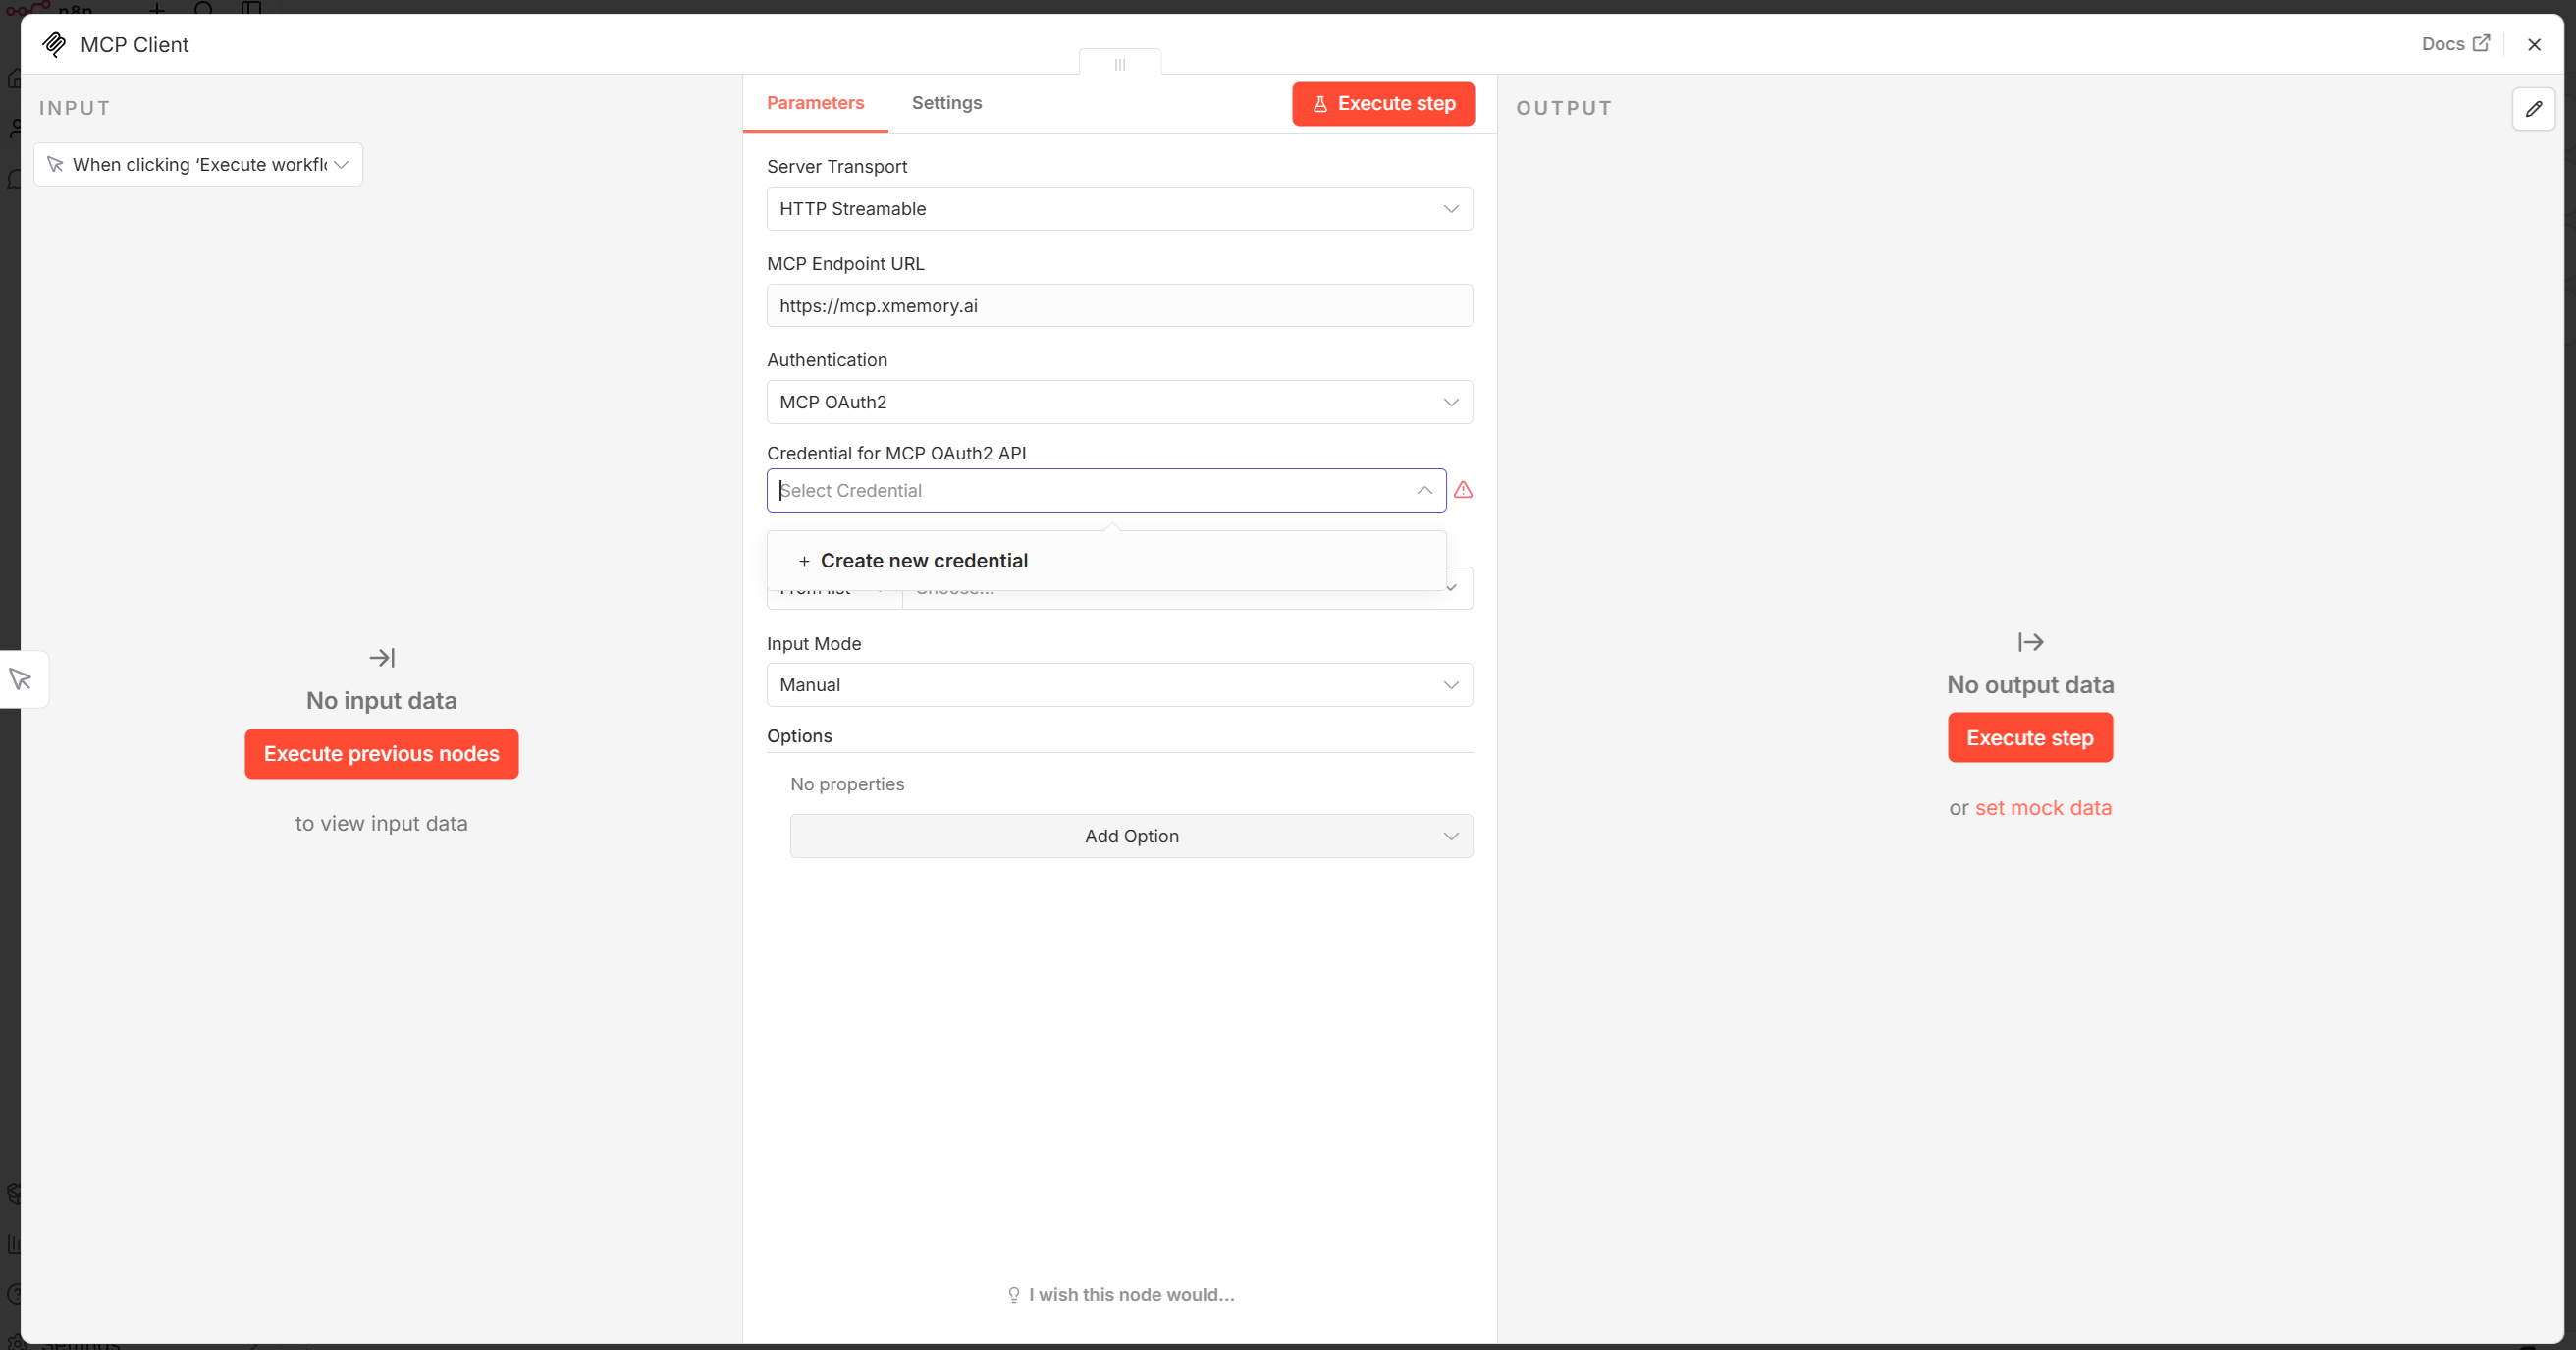
1) MCP credentials and auth type
Section titled “1) MCP credentials and auth type”Set the MCP server address to https://mcp.xmemory.ai/ and use OAuth2 authentication.
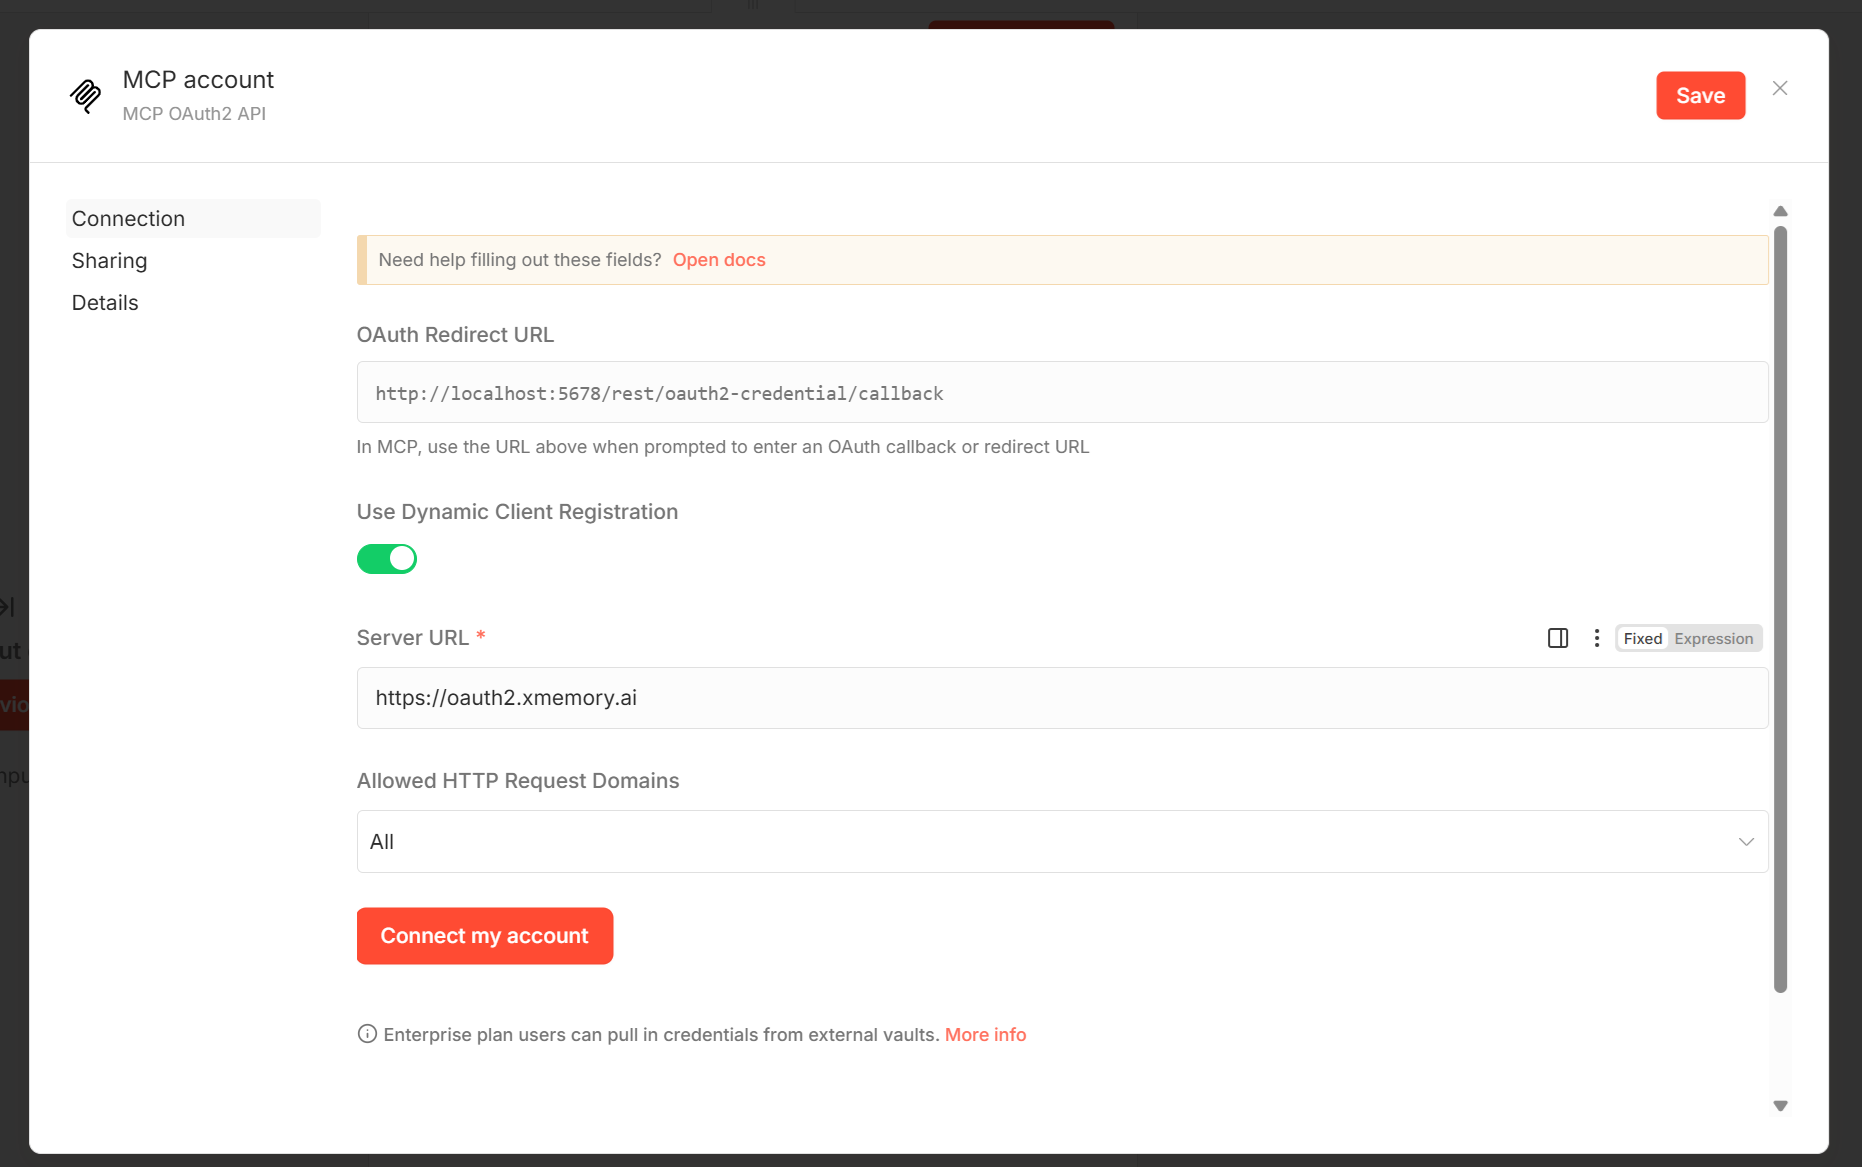
2) OAuth2 server address
Section titled “2) OAuth2 server address”Configure the OAuth2 authentication via https://oauth2.xmemory.ai/ xmemory server.
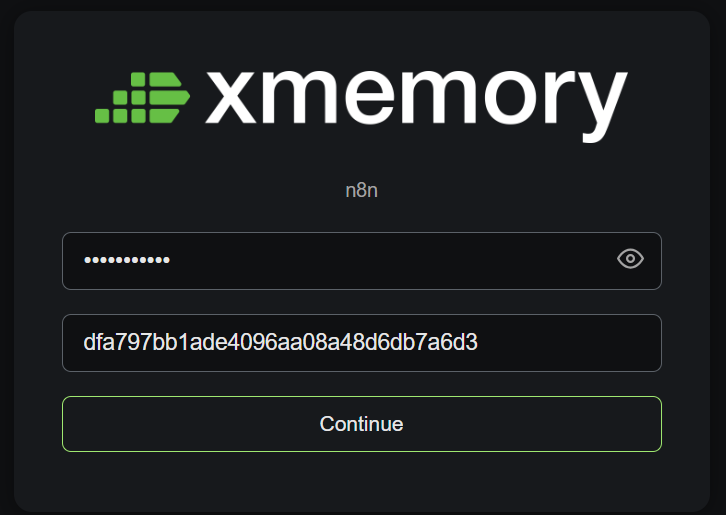
3) Login and instance selection
Section titled “3) Login and instance selection”Sign in on the xmemory login page (use the API key) and select the instance you want the MCP session to use.
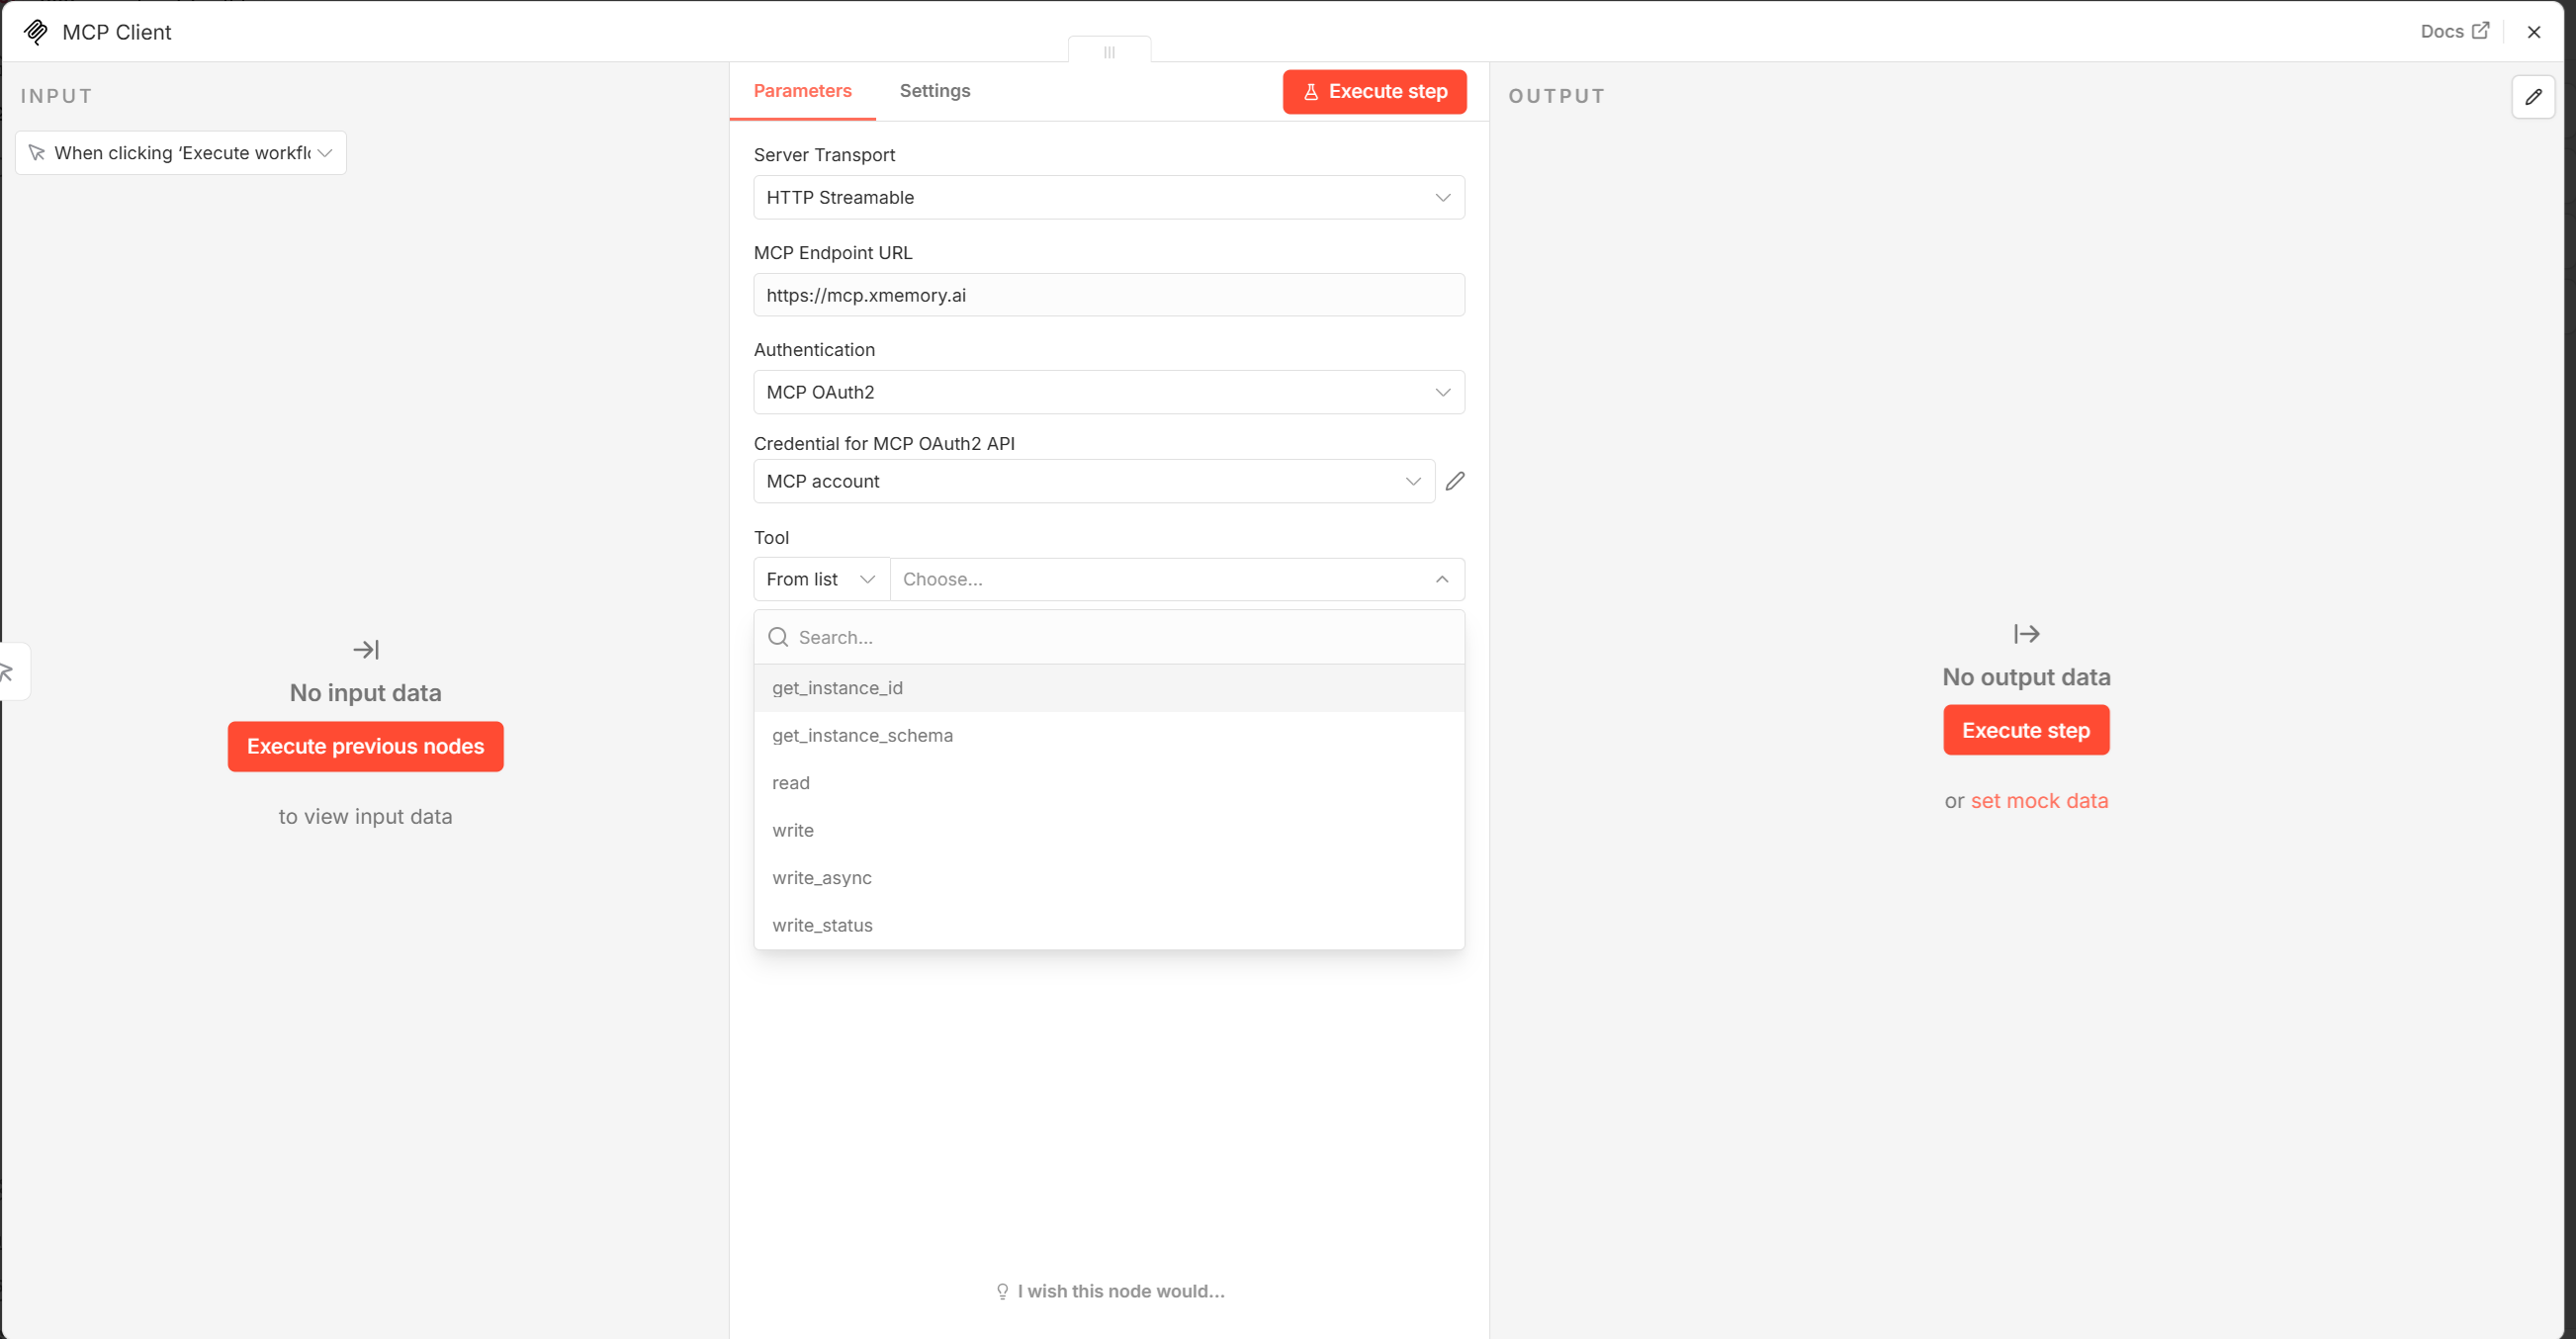
4) Available xmemory MCP tools
Section titled “4) Available xmemory MCP tools”After successful auth, n8n lists all available xmemory MCP tools.